Showing posts with label Before and After. Show all posts

Monday, November 19, 2012

All Shiny and Bright!

Just thought I'd share an amazing little cleaning tip I tried awhile back
using VINEGAR!

Here's our kitchen sink faucet BEFORE.
Check out all that hard-water build-up!! Gross!!!

 The crazy thing is this is even AFTER I scrubbed it with my regular household cleaner.


I soaked some paper towels in vinegar, wrapped them around the faucet and left them there for about an hour.  Removed the paper towels, gave it a rinse, and VOILA! :)

 AFTER:

MUCH much better :)

Sunday, September 23, 2012

Bathroom Makeover Reveal


So like I said in my previous post, we started re-doing rooms in our house.

It's not that our house necessarily NEEDED a revamp, but it's because when we first moved in, I was so excited to finally have a house to decorate, I said,  

"hey, let's paint this room green, and this room bright orange, and this room brown......."

Yep..... head in the clouds.
I got smart though, and started looking at LOTS of ideas so that I could hone in on what I like.

BEFORE
See the yucky brown color and sliding glass doors??


I knew those sliding doors and brown paint were gonna be the FIRST things to go! And funny, that 
my brothers took care of both of those items for me:

Brother #1: I hate sliding shower doors cuz of all the build-up they collect. I had planned to get ride of them....sometime.  Well, SOMETIME finally came rather unexpectedly back in June when my little brother Jared got home from serving his mission in Chile for the Church of Jesus Christ of Latter-Day Saints. We picked him up at the airport and he came over to our house along with the rest of the family for a little family party.  He had gone for like two days without showering (long plane rides).  He jumps in the shower and ten minutes later we hear a loud bang followed by him yelling:"Ahhhh, HELP!"  Rather than burst right in, I frantically knock on the door asking if he's ok.  He yells that it's "safe" to come in and to hurry. I open the door, hahhaa, (funny image coming back) and he is standing there stradling the tub with the sliding shower doors on top of him. hahaha. We lifted them off him wondering how the heck that happened.  He said they just fell. rrriiigghhhttt ;)  Luckily though I hated them in the first place so....shower doors removed, Check!

Brother #2: I HATED that nasty brown color.  What were we thinking when we painted that??? I guess it was a LITTLE better than the yellow color it was when we moved in....but not much. I decided on gray, a light neutral color.  My little brother Jason came to visit Dustin and I for a few days.  He got bored so I told him he could paint the bathroom if he wanted to, and I'd pay him.  We had 1/2 a gallon of gray paint which we added white paint to, to make the color lighter.  He did a GREAT job. Thanks Jason!  Nasty brown color gone -- check!

DURING 
I decided I wanted paneling -- NOT beadboard, and not really board n' batten, but paneling.  
It was a little more difficult than we thought because we had to cut around outlets, the toilet paper wall insert, and yeah.... Dustin was really good with this.  I told him what I wanted and he did it all :)

We put up the paneling with Liquid Nails, 
nailed it in place, 
& added fancy baseboard/trim to the top and bottom.

Busted out some wood filler since the outlet was tricky!

After LOTS of caulking, and white paint:


I drilled towel hooks (all by myself while Dustin wasn't even home -- I know, I'm good ;) ha. 

 
Spray-painted some mirrors, made the sign (details here), and bought new towels from Target.

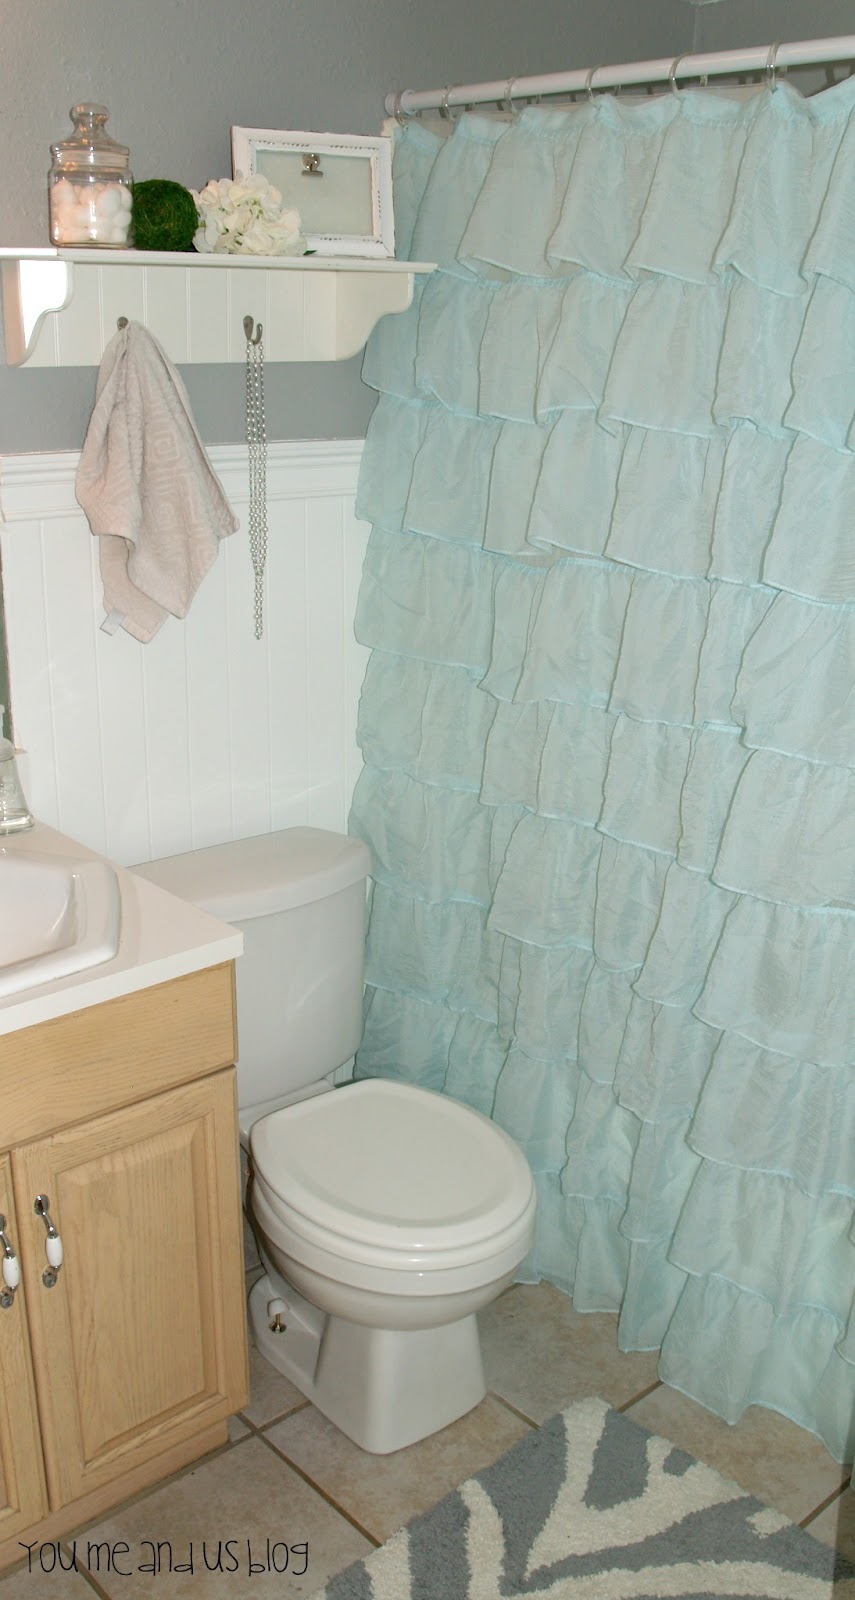
 I bought the teal ruffle shower curtain online from Amazon for 20 bucks.  Love it :)

Dustin hung up the shelf and I added the decor.  We make a good team ;)

I got the jar and frame at Goodwill, 

I painted and distressed the frame, 
then added cute scrapbook paper with a clip to hang a pic if I choose.

Hung a hand-towel we had and a string of pearls.....and picture perfect ;)
My favorite part is that the hand-towel hides the outlet :) muahaha

I gotta add a little spice of realistic life in here.  Dustin painted this picture....well, WE each painted this exact same picture at a 3 hour class we took, but his turned out sooo much better than mine. haha. 
Mine is...well....sad. 
Hence, here hangs HIS :)

 I also love this rug (Target).  It ties in with the gray walls.

Wahoo :)

Monday, September 10, 2012

Baby Flower Clips

 
So ok, let me preface this post with 2 things:

1) I am NOT pregnant...but stay tuned ;) haha
and
2) I am ridiculous when I try to be creative.

There. Now you are prepared and have most of your questions answered for what lies ahead.

SO, let us begin.
A long time ago....  ;)  

This was one of my VERY FIRST projects...EVER.....we're talkin 2 years ago when I first was discovering crafting. I made these for my boss who was pregnant with a girl ........(I don't even know why I even added the"with a girl" part. Duh.  Flowers= girls  Anyway.......)

I'm was pretty happy they turned out so cute but at the same time....I secretly really wanted to keep them. But alas, I gave them away.
So...since I didn't, and don't, have any kids of my own, I was trying to figure out SOME way to pose them so I could take a picture.

Enter in the ridiculous:

Yep, I really did that. I turned a vase upside down,
And to make it more "realistic".....oh boy...... I drew on eyes and a mouth.

I just laugh at myself looking at these.  :) BUT I will say that I'm pretty proud of myself because there wasn't a Pinterest with a great tutorial back then that I could follow or anything. I just looked at a flower clip I already had and said "Psh, I can make that." So I did!

What I did:
Took some awesome fake silk flowers,
Removed the yucky middle and took the flower apart,
Decided which flower petals I wanted for the flower,
Hot-glued the biggest flower petal to a small circle of felt,
Hot-glued the rest of the flower petals on top of that,
Added beads/buttons for the flower center,
Added glitter on the flower,
Hot-glued an alligator clip to the bottom of the felt.

And voila! 
Before: Left flowers
After: Right flowers


 I just checked and I still have a few of these flowers left SO.....maybe in the "near" future I'll be making some of my OWN! ;)

Sunday, September 9, 2012

Bringing My Shower Curtain to Life!


When Dustin and I first got married, we bought a cheapy $7 shower curtain from Walmart for our Master Bathroom.  I don't know WHY it took me forever to realize how gross-looking it really was-- pink and orange and plastic.  And I am SO surprised and sad I don't have pictures to show off this craziness.....just use your imagination and really it....it was pretty gross.

I've learned I hate plastic shower curtains... It just hangs onto all that soap scum and what kills me is that you can actually SEE it. ...YUCK!

So when we started putting some money into our house and actually BUYING our own decor (gotta love all those RANDOM newly-wed gifts you get, haha)... I knew the bathroom was the FIRST thing that was getting a re-do.

As I started the process, I logically started thinking about what colors I wanted. As I looked to the towels we had for "inspiration".... I honestly just started laughing:


Pink, orange, purple, blue...man, at this rate why don't we just paint a rainbow in our bathroom? ;)  So obviously you can see why I leaned toward a more neutral theme. ;)

I saw, loved, then bought this shower curtain I found at Anna's Linens which is conveniently (depending on if you ask Dustin or myself) located 2 minutes from our house.

I decided I wanted some "pops" of color so I looked at the fun assortment of ribbon I had.
Looks as random as the towels eh?
 

I found some RED ribbon...tested it out..  Loved it.

I hot-glued it right down the middle....


....bought white towels, used a vase of red flowers I already had....and voila!


So simple yet SUCH a big difference by adding that little splash of color.


And again,


Friday, August 31, 2012

Mother's Day Wreaths

Since we're taking a blast to the past, here are the Mother's Day gifts that Dustin and I made for each of our moms and our grandma.

(And yes I DID say that DUSTIN helped make this...I actually just sat next to him sipping lemonade while acting a slave-driver.  I've trained him well ;)


Yes we used foam and duct tape to create our wreaths . 
Before you think this is a super good idea,  keep reading. 

Material for Wreath #1

 Material for Wreath #2

Material for Wreath #3
No picture, sorry. haha. But it's coming up :)


How we made them:
Sorry we don't have any "tutorial"-type photos. This was all pre-blogging time.
We basically wrapped the material around the wreath, hot glued,
then followed this tutorial to make and glue felt roses in a cute cluster.
Little banners made of ribbon and material (burlap on 2 of them) were then strung across the middle.
Sorry again for the extreme lack of detail. If you want to make this it's not too hard to figure out. :)

Wreath #1


And again,


Wreath #2


 And again,

Wreath #3

And again,

All 3 Wreaths:


Now, as you saw, we used foam and duct tape to make the wreaths.
Pause.
Sometimes you come across ideas that APPEAR to be simple and money-saving ... like this:


Foam and Duct Tape: Cheap idea for a wreath right??
That's what I thought too.
But unfortunately as time went on, after we had given these gifts to our moms, we went back to visit and found them hanging on their door sorta shrively.  SO, even if you duct-tape the wreath to death, (which we did) it STILL will never look quite round and will end up bending all over the place eventually. :(  Sad I know. 

So, I've learned that sometimes you gotta just spend the little bit of extra money if you want it to turn out right the first time. :) 

(That way you can avoid looking back and going "and WHY didn't I spend those extra 3 bucks again to get a pre-made wreath?!?" hahaha :)